
Caulking for Dummies is something I actually Googled myself in the past. Learning how to caulk is an essential part of any bathroom renovation or maintenance routine. It helps to keep water from penetrating gaps and seams, which can lead to mold, mildew, and other damage. In this article, we’ll go over the basics of caulking a bathroom, including the tools you’ll need, the types of caulk available, and some tips to help you get the job done right.
Tools You’ll Need
Before you start caulking, you’ll need to gather a few tools. Here’s what you’ll need:
1. Caulk gun
2. Caulk removal tool
3. Masking tape or painter’s tape
4. Scissors or a utility knife
5. Caulk smoothing tool
6. Rags or paper towels
7. Caulk (silicone, acrylic, or hybrid)
Types of Caulk
There are three main types of caulk that are commonly used in bathrooms: silicone, acrylic, and hybrid. Here’s what you need to know about each type:
1. Silicone caulk: This type of caulk is best for areas that are frequently exposed to water, such as around the shower or bathtub. It’s waterproof and has good adhesive properties, but can be difficult to remove if you need to make repairs later on.
2. Acrylic caulk: This type of caulk is water-resistant but not waterproof. It’s best for areas that don’t receive a lot of water exposure, such as around the sink or toilet. It’s easy to apply and can be painted over once it’s dry.
3. Hybrid caulk: This type of caulk combines the best properties of silicone and acrylic caulk. It’s waterproof, flexible, and easy to apply, making it a good choice for most bathroom applications.
How to Caulk – Prep Work
Before you start caulking, you’ll need to prepare the area. Here’s what you need to do:
1. Remove any old caulk using a caulk removal tool.
2. Clean the area thoroughly with a bathroom cleaner and a rag or paper towel.
3. Allow the area to dry completely before caulking.
4. Apply tape to the edges of the area you’ll be caulking, this will help to create a clean line.
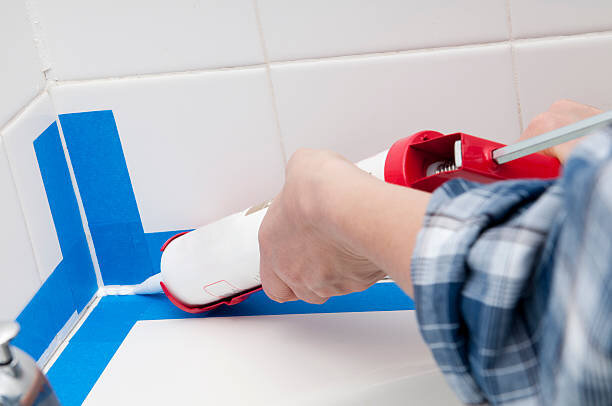
How to Caulk – Application
Now that you’re ready to apply the caulk, here’s what you need to do:
1. Load the caulk gun with the caulk.
2. Cut the tip of the caulk tube at a 45-degree angle.
3. Apply a smooth, even bead of caulk along the edge you’re caulking.
4. Use a caulk smoothing tool to smooth the caulk and remove any excess.
5. Remove the tape immediately after smoothing the caulk.
6. Allow the caulk to dry for the recommended time (usually 24 hours) before using the bathroom.
Caulking for Dummies – Pro Tips
Here are some tips to help you get the best results when caulking your bathroom:
1. Use a high-quality caulk that’s specifically designed for bathrooms.
2. Don’t skimp on the caulk – apply enough to fill the gap completely.
3. Smooth the caulk as you go to avoid having to go back and fix mistakes later on.
4. Use a damp rag or paper towel to clean up any excess caulk before it dries.
5. Don’t use the bathroom or get the area wet until the caulk is completely dry.
Conclusion
Caulking a bathroom may seem like a small task, but it can make a big difference in the lifespan of your bathroom fixtures. By following the steps outlined in this article and using the right tools and materials, you can ensure that your bathroom stays free of leaks, mold, and other damage for years to come. For more information and pictures about your caulk job, check out Home Depot’s article on Caulking for Dummies!